DIY Rutes: How To Make Your Own Multi-Rod Drumsticks


I once needed to craft my own rute drumsticks because, at least at that time, it was more cost efficient to buy the raw materials and make some rather than go to the store and buy some made by a drumstick manufacturer.
I thought I would share my 6-step process in case someone runs into circumstances where they are not able to get their hands on this great drumming tool, or for those DIY lovers out there.
Table of Contents
First - why make your own rutes?
There are three main reasons I can think of as to why you’d want to create your own rutes (aka drum rods or multi-rod drumsticks):
- You want to save some money.
- You can’t gt your hands on any rutes and have to build your own.
- It’s fun and rewarding to build your own tools, and we don’t get that chance too often as drummers!
Note that the first time I created my own drum rods the cost saving was larger than this time around - it really depends on the current price of materials versus the cost of a professionally branded pair of rutes so if you’re planning to save some money check both prices first.
For those of you that haven’t used these type of drumsticks they’re great for when you want to play more quietly or change up the sound of your drumming.
What you’ll need for this DIY rutes build
Required materials
- Small Dowels, in this build I used ¼” oak dowels (x7)
- ¾” Heat Shrink tubing, 14-16” in length
- ½” I.D. (inner diameter) O-Rings
Required tools
- Saw or wire cutters, note that smaller dowels can be cut using wire cutters and later sanded smooth
- Heat gun or a hair dryer
- Sandpaper
Additional info about the tools and materials
Drumsticks are made using hardwood because it can take repeated abuse without rapidly deteriorating. When you are choosing your dowels (assuming you’re using wooden dowels of course) make sure that you are using hardwood if it’s available and not softwood.
Using a hardwood will ensure you get a longer life from your rutes!
Initially I purchased some shrink tubing with the wrong diameter (it was too small). After discovering this I went back to my store and traded them for a ¾” diameter tubing which is what I used on the final product and listed above.
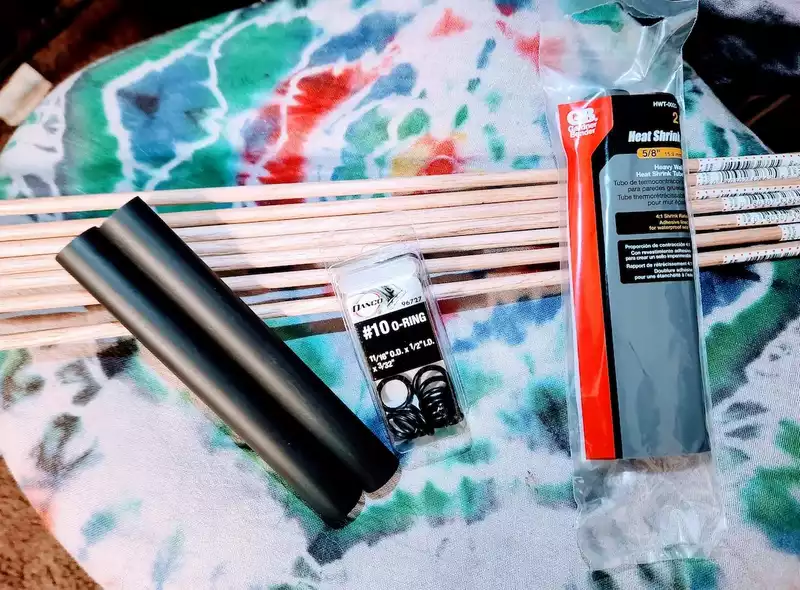
Not that the O-ring packaging will have both inner and outer diameter sizes listed.
The outer diameter isn’t as important as the inner diameter here, just be sure you’re using round outer diameter and not square or some other gasket shape. We’re mostly trying to contain the smaller dowels inside the traditional ½” diameter of a drumstick, give or take a little.
In the required tools section I listed wire cutters or a saw. If you don’t have a saw a good set of wire cutters can be used to get close to the desired final length, and then after assembly the end of the rute can be sanded smoothly.
Heat shrink tubing typically only needs around 110F-125F degrees to properly shrink. The recommended temperature may be listed on the packaging or the tubing itself.
Regardless, a heat gun will shrink the tubing but so will a regular hairdryer which is what I used for this build.
I do have a heat gun but I wanted to make sure that only using the hair dryer for this build will still work well for those of you that don’t have a heat gun - my wife’s hair dryer worked great!
If you’re using wire cutters you’ll need some sand paper to smooth out the cuts, you can also use the sandpaper to taper the rods in the final (optional) step.
Step 1: bundling the sticks together
The smaller the size of your dowels, the more will be required to fill the ½” of the O-rings.
I needed 7 of them, so I gathered them together and secured a single piece using one O-ring on each end.
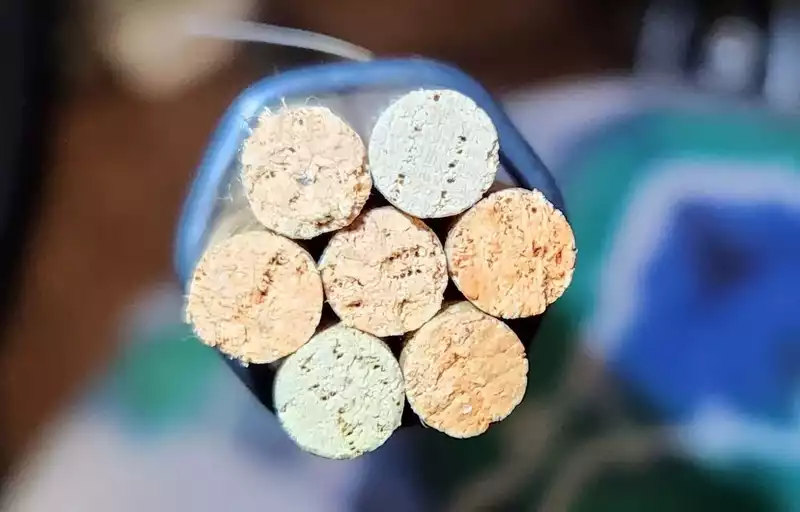
I remember dowels coming in much longer sizes, but when I came to this section in my hardware store they only had them in 36” sizes. For drumsticks this is just right as I only need 16” (x2) so I ended up cutting some of these away.
Step 2: adding the shrink tubing
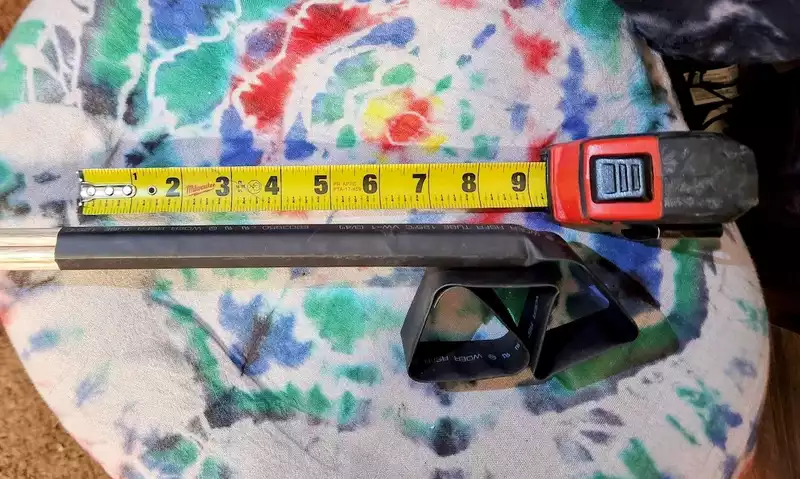
On each end, push the O-ring towards the center as you insert the bundle of sticks into the heat shrink tubing. There is no exact measurement, just ensure the bundle of dowels is at least halfway covered. This will secure the bundle and give more of a solid feel to the final result.
Step 3: cutting the shrink tubing
Make sure to cut the shrink tubing leaving some space for it to shrink down and wrap around the end of the bundle.
If you cut too short, or flush, the tubing won’t secure the bundle as tightly and this may cause the whole bundle to come apart as you’re playing. I’ve left about ¼“ for this build and they wrapped the bundles nicely.
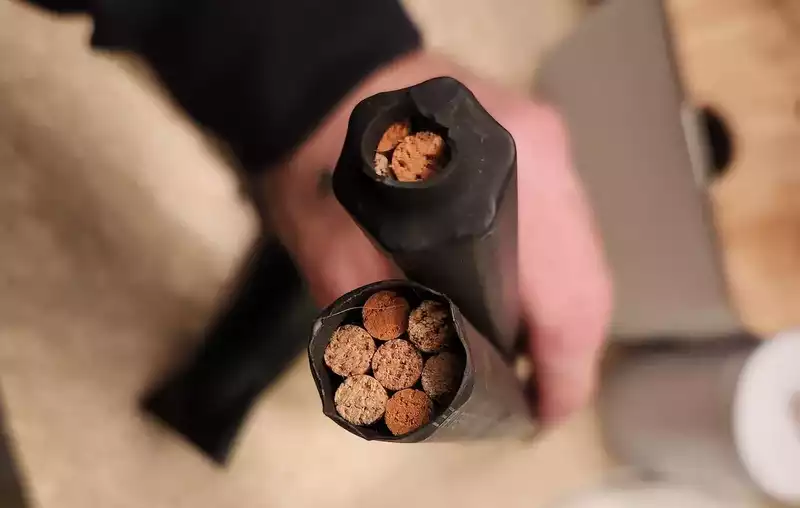
Step 4: cutting the bundles to size
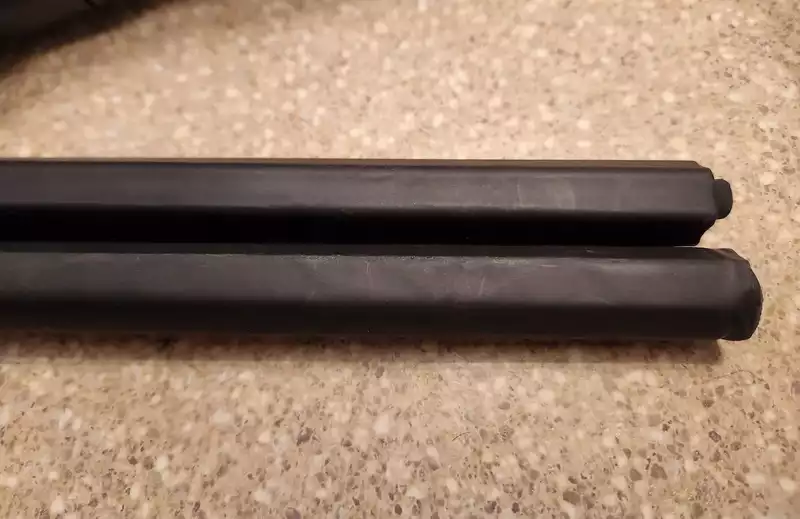
You can wait until after you’ve shrunk the tubing but I decided to cut the bundles to size first due to a few reasons:
- I could shrink both tubes onto the bundles at once when they are separate.
- They are easier to control than the longer, single bundle.
- In case the sawing loosened the single dowels in the bundle, I decided to shrink them after cutting.
I used a skill saw to cut through my bundle, but could have used any saw really - the cutting method isn’t as important as the final length.
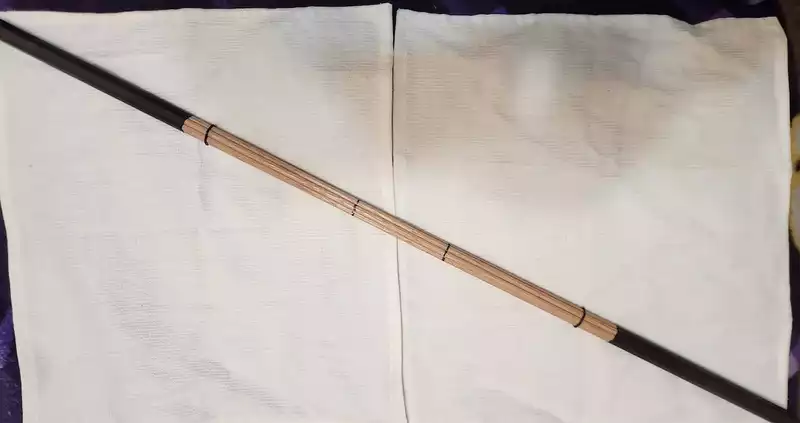
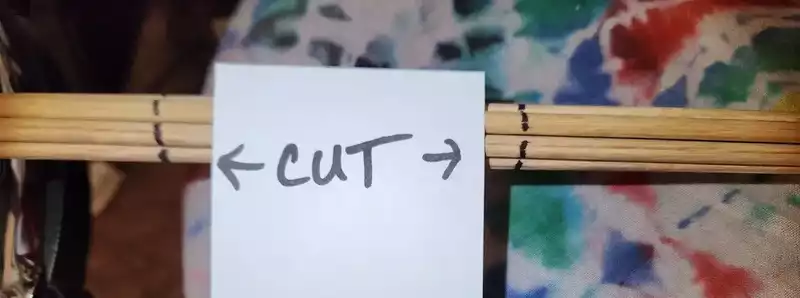
16” is the length I chose as it’s a standard length. Drumsticks typically range from 15-17 inches rounding off, so I went with median length for this build.
Remember, if you’re using something that leaves jagged or rough edges on the open end (end without tubing), give some extra length. ¼“or less should do it unless you’re using your teeth. Don’t use your teeth.
Step 5: shrinking the tubing using heat
It’s time to secure the heat shrink tubing finally!
As I mentioned before, my wife’s hair dryer worked fine. It took a little longer than my heat gun would have, but the result was the same.
When I tested using my heat gun, the tubing didn’t shrink any further.
You want to look for wrinkles before you apply the heat. As you begin to heat, position the tubing so you can visually see a wrinkle.
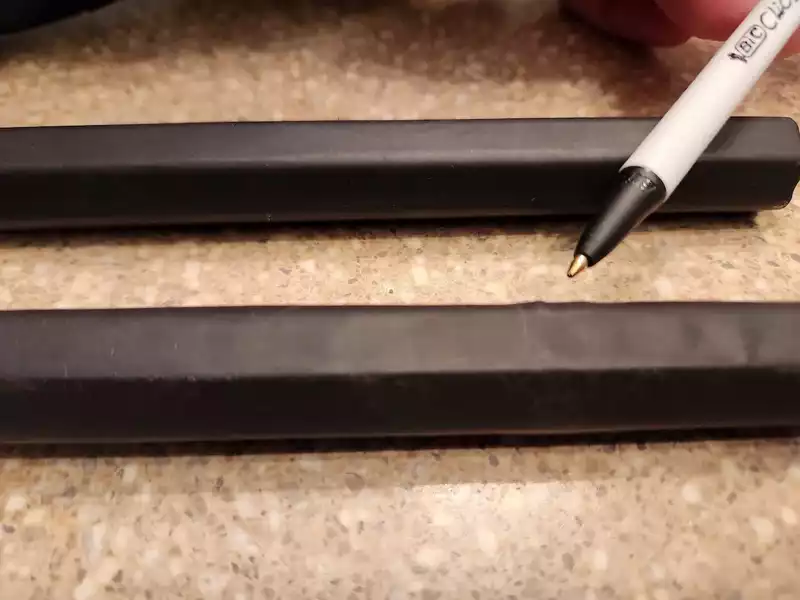
This way, you can watch as the tubing shrinks, and the wrinkle stretches out and disappears. By this you can judge that you are using enough heat, plus about how long you need to leave heat for the tubing to fully shrink down.
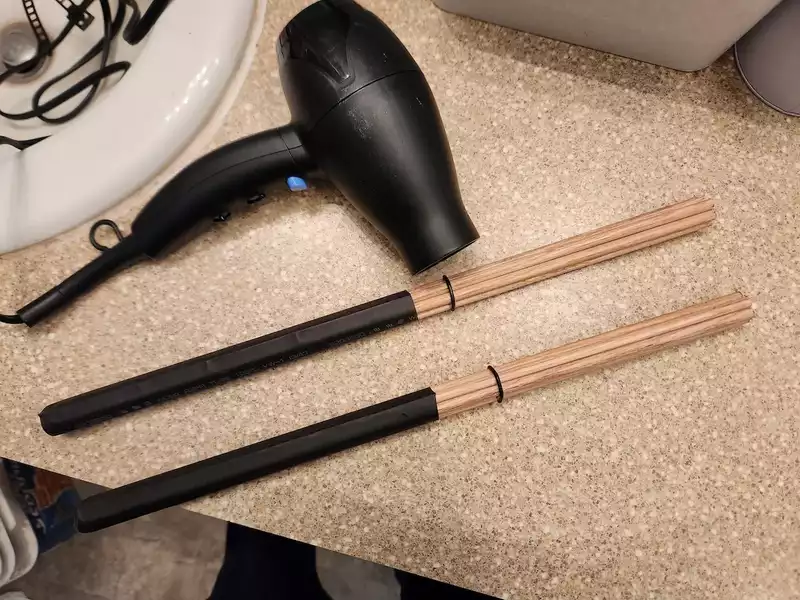
Step 6: applying the finishing touches
This is where you’ll put another O-ring on for stiffness adjustments. You can test by playing with the rutes and making adjustments to O-ring placement until you’re happy with the feel and the sound.
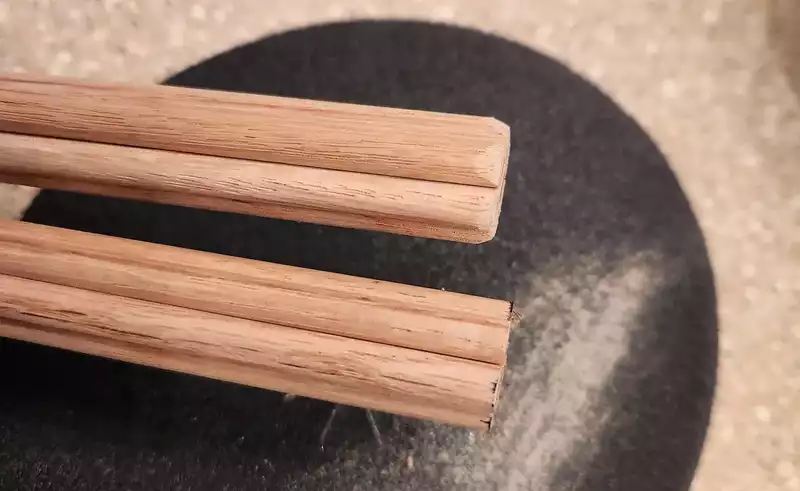
As a finishing touch I like to taper the edges of the open end of the rutes, this helps the drumheads take less abuse. Note that most manufacturers don’t taper their ends.
Keep in mind that the taper will change the sound slightly - but you need a really keen ear to hear the difference. I used 120 grit sandpaper after a courser sandpaper which resulted in a nice taper to the end:
If you’ve left too much shrink tubing past the end of the rods this is where you’ll trim it up. If you pushed them too far up the stick (towards the tip of the rods you’d be hitting the drums with), I wouldn’t recommend trying to cut the tube shorter as you may accidentally cut into the timber and shorten the lifespan of your rutes.
Final result and what they sound like
Here’s the find result of this DIY rutes build:

And here’s what they sound like when compared to 5a drumsticks:
Conclusion
At the end of the day, I am a drummer and not a professional carpenter, or any sort of engineer aside from backyard ingenuity but the results are pretty good. This was just a project born out of need several years ago, and I figured I’d share the idea. I hope you find it useful!
If you’re trying to save money by making your own, this unfortunately isn’t likely going to be the case. Not that it costs more, this project cost me around $22 US total, and I saw a pair of professionally branded rutes for just $3 more. There is a slight savings though.
The main reward comes from playing my own crafted rutes, and these will last just as long as those I saw at the drum store, possibly longer (which would result in another small saving).
Who we are
AboutDrumming.com is run by a group of drum teachers, drumming professionals and hobbyists. We love all things drums, and when not drumming we spend our time adding more awesome content to this website!
Free tools
You may also like
- Drums Too Loud When Practicing? Here's What You Can Do
- 5A vs 7A Drumstick Guide: Which Stick Is Right For You?
- Looking For The Best Drum Wrap Company? Here's Our Top Pick
Affiliate Disclosure: When relevant AboutDrumming.com uses affiliate links (at no additional cost to you). As an Amazon Associate I earn from qualifying purchases.